How to use the Raspberry Pi as a Network Camera
The Raspberry Pi has become quite popular in the recent years. It is an inexpensive, universal piece of hardware for do-it-yourself enthusiasts that can be used in a lot of projects.
Of course it can also serve as a network camera and for time-lapse recording.
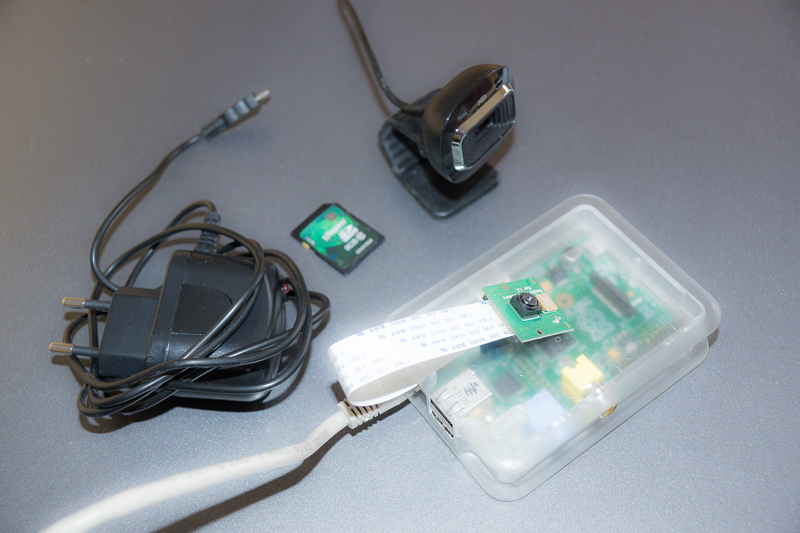
The great thing is: you can connect multiple cameras to it! Besides the Rasperry Pi Camera module you can attach (multiple) USB cameras.
Here we will show the steps to use a Camera module + an additional USB camera and then use it in our service.
Step 1: Buy the Hardware

Part list:
- Raspberry Pi 1 / 2 / 3
- Power supply
- (micro)SD Card
- Rasperry Pi Camera module
- an USB camera, i.e. the Microsoft LifeCam HD-3000 – camera list
- Wifi USB dongle (not required on Raspberry Pi 3) or Network cable
- Raspberry Pi Case
Step 2: Basic system installation
First you need to install the OS and required software to the get the Raspberry Pi online. The best way is to start with Raspbian (a Debian based Linux) which is popular and there are a lot of tutorials all over the internet.
We will not go into detail on these steps as there are already great other tutorials from Adafruit. The following are recommended:
Then log into you Raspberry via ssh and check your network with ping webcam.io. If everything is ok it should look similar to this:
$> ping webcam.io
PING webcam.io (104.18.38.23): 56 data bytes
64 bytes from 104.18.38.23: icmp_seq=0 ttl=58 time=22.213 ms
64 bytes from 104.18.38.23: icmp_seq=1 ttl=58 time=22.265 ms
64 bytes from 104.18.38.23: icmp_seq=2 ttl=58 time=22.476 ms
...
Then upgrade your system and add some packages required here:
sudo apt-get install rpi-update
sudo rpi-update
sudo apt-get upgrade
sudo apt-get install fswebcam ftp-upload
This can take a while on the Raspberry Pi 1.
fswebcam is required to grab the image from the USB webcam. And ftp-upload is used to upload files later to webcam.io
Step 3: Camera module Setup
First you need to install the camera module hardware if not done already (powered off, of course) and enable the camera for the OS:
sudo raspi-configActivate ‘Enable Camera’. Finish and reboot.
Then try taking an still photo:
sudo raspistill -o /tmp/cam.jpgCheck if filesize is greater 0:
ls -la /tmp/cam.jpgYou can also copy it over to your desktop using scp (from your desktop). Mac OS example:
scp pi@YOUR-RASPBERRY-IP:/tmp/cam.jpg .
open cam.jpg
That’s it for the RaspiCam.
Optional: create a ram disk. When capturing the still image every minute there are a lot of files written to the SD card per day. To expand the cards lifetime we use a ram disk instead:
sudo echo "tmpfs   /var/tmp        tmpfs   nodev,nosuid    0       0" >> /etc/fstab
sudo mount -a
Step 4: USB Camera Setup
Connect the USB camera (perhaps reboot) and take a photo:
sudo fswebcam -S 5 -r 1280x720 /tmp/cam1.jpgThis is skipping 5 frames for the LifeCam HD-3000 to fix a bug with broken images. And the camera only has a 1280x720 resolution.
Then again check the image:
ls -la /tmp/cam1.jpg If everything is fine you can proceed to uploading the images in the next step.
Step 5: Connect to webcam.io
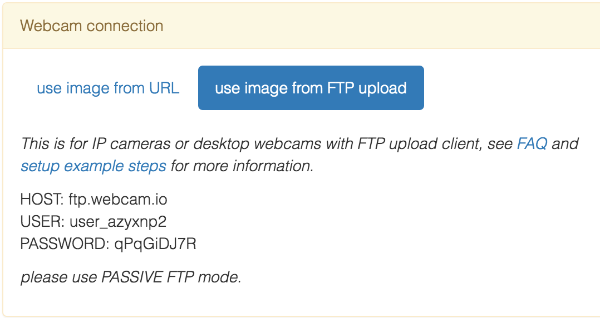
First, sign in to webcam.io and create two webcam entries with FTP connection set. (You can try out the FTP connection by signing up for the free trial)
Grab your credentials from the webcam settings page.

Now set up a script for RaspiCam picture upload:
sudo nano /usr/local/bin/picam_upload.sh

...

#!/bin/bash
raspistill --thumb none --exposure auto --mode 1 -o /var/tmp/snapshot1.jpg
ftp-upload --host ftp.webcam.io --verbose --passive --user user_XYXYXXY --password XXXXYYYY /var/tmp/snapshot1.jpg
This limits the image to full HD size. See documentation for camera control and raspistill options.
And another one for the USB cam:
sudo nano /usr/local/bin/usbcam_upload.sh

...

#!/bin/bash
fswebcam --no-banner -S 5 -r 1280x720 /var/tmp/snapshot2.jpg
ftp-upload --host ftp.webcam.io --verbose --passive --user user_XYXYXXY --password XXXXYYYY /var/tmp/snapshot2.jpg
Then make them executable with and run a test:
sudo chmod +x /usr/local/bin/picam_upload.sh /usr/local/bin/usbcam_upload.sh
/usr/local/bin/picam_upload.sh
/usr/local/bin/usbcam_upload.sh
If there are no errors, you can schedule the upload by using cron
sudo crontab -e

...

* * * * *   /usr/bin/flock -n /var/tmp/picam_upload.lockfile -c /usr/local/bin/picam_upload.sh > /var/tmp/picam_upload.log 2>&1
* * * * *   /usr/bin/flock -n /var/tmp/usbcam_upload.lockfile -c /usr/local/bin/usbcam_upload.sh > /var/tmp/usbcam_upload.log 2>&1
This takes a snapshot every minute. And it uses flock to have only one upload script (of each type) running at a time.
Wait a minute and then check your webcam.io webcam pages.
Of course you can also use the cameras without webcam.io. You can upload via FTP to your own server. You can also render your own time-lapse videos on the Raspberry Pi itself. This needs a lot of precessing power and might block your system from taking in new snapshots, especially with multiple cameras. At least a Raspberry 2 is recommended.
Conclusion
For around 60-100 dollar you can build a universal network camera you can always change for your requirements and have full control over. To build it into a weatherproof casing for outdoor usage is only one example.
Have fun using your camera(s). Embed them somewhere and share great time-lapse clips!