How to stream your IP camera to YouTube Live
By sending your IP camera’s video stream to YouTube and integrating the player into your website, you can create a reliable 24/7 live view for an almost unlimited number of users.
If streaming to YouTube is possible, depends on your camera’s capability to provide a H.264, MJPEG or MxPEG stream, and on the camera connection bandwidth. At least 1Mbit/s (upload) is recommended; but streaming with lower framerate and resolution will work.
If your camera is accessible from the internet, you can start right away with these steps:
- Find your camera’s stream URL
- Set up YouTube Stream Now (and get the target Server URL and Stream key)
- Set up webcam.io and start streaming
Requires a webcam.io account. Sign up for the free 7-day trial to try out all features.
Update: new YouTube Interface, see Using YouTube Live.
Step 1 – Find your camera’s stream URL
The video stream URL is usually visible in your camera settings in streaming/video/h.264/RTSP sections. If you cannot find it there, a short google search of you camera model/vendor and ‘RTSP’ or ‘video stream’ should help.
The URL needs to be accessible from our servers. This perhaps requires a port forwarding, dynamic dns setup on your side. Or even better a static IP.
H.264 encoding via RTSP connection is recommended. MJPEG, MxPEG (Mobotix) also work if transcoding is activated in Step 3.
Step 2 – Set up YouTube Stream Now
The Stream Now feature of YouTube can be used for testing and production usage. It will detect the stream parameters automatically.
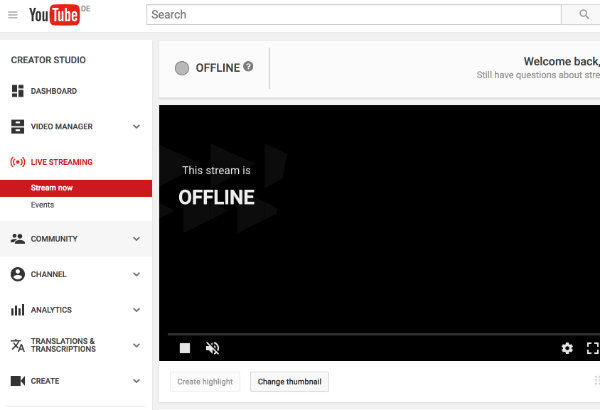
To set up the stream, go to the Creator Studio by clicking on the profile in the upper right corner (things might be different for your YouTube account).
Then open Streaming -> Stream Now in the left navigation bar:

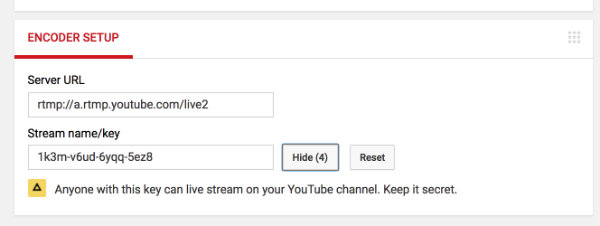
The interesting part is the Server URL and the Stream key - we will need it in the next step:

And you might want to set the stream to unlisted/private for testing.
Step 3 – Set up webcam.io and start streaming
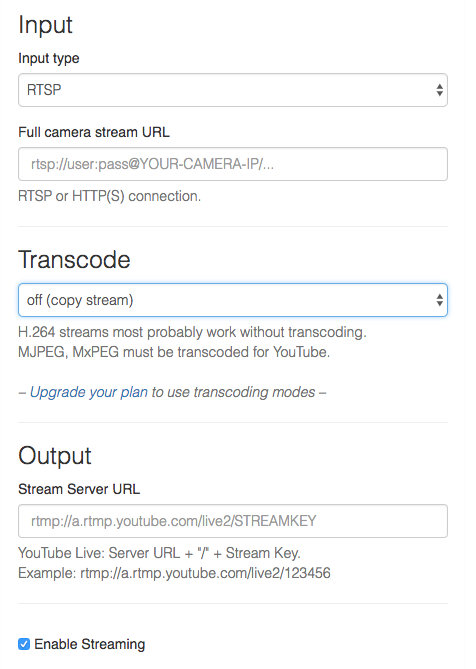
Head over to webcam.io and add a new webcam of type ‘Live stream’:

Fill in the streaming URL of your camera (from step 1) into the Input section. And the YouTube stream target URL from step 2 into Output
Transcoding: For H.264 streams, you can try the ‘off (copy stream)’ setting.
Transcoding is required for cameras not supporting H.264 (like MJPEG url or Mobotix MxPEG). Or if you have an unusual quality setting, not supported by YouTube. Transcoding puts more load on our servers and requires the LIVE+ plan.
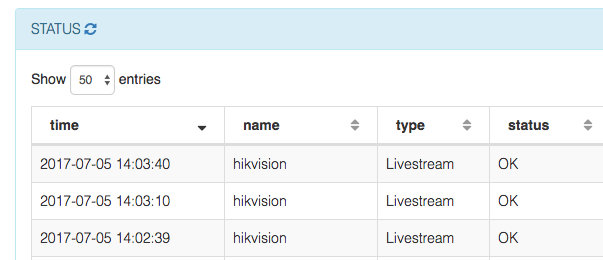
By saving the webcam settings (with Enable streaming checkbox activated), streaming will start within the next 30-60 seconds. The stream status is visible in the status box in your dashboard:

On the YouTube Stream Now page, status should change after a few minutes and then the live player shows the video stream.
To see if it is stable, just leave the page open for 10-30 minutes and watch the Stream health status.
If everything is fine, you have a working live stream now!
Please contact us for help! Especially if your stream does not start or if you cannot find the video stream URL of your camera. Also see FAQ.